Materials Required:
- 275 gallon water tote
- 3 feet of 2" diameter PVC pipe
- 4 feet of standard garden hose
- 1/2" watering nipple
- Miscellaneous pipe & garden hose fittings
- 2 feet of 6" flex pipe
- Drop-in Tank De-Icer*
- 6 foot Water Pipe Heating Cable*
- 8' solid copper ground rod, clamp, and 12' bare copper wire
* Important: These thermostatically controlled heating elements are set to turn on at 35 degrees F, so that you're not wasting electricity. Make sure that if you build one of these, do not get a regular "heater" unless you really want to pay for your pigs to drink water that is actually warm. We are only looking to keep it from freezing!
Photos:
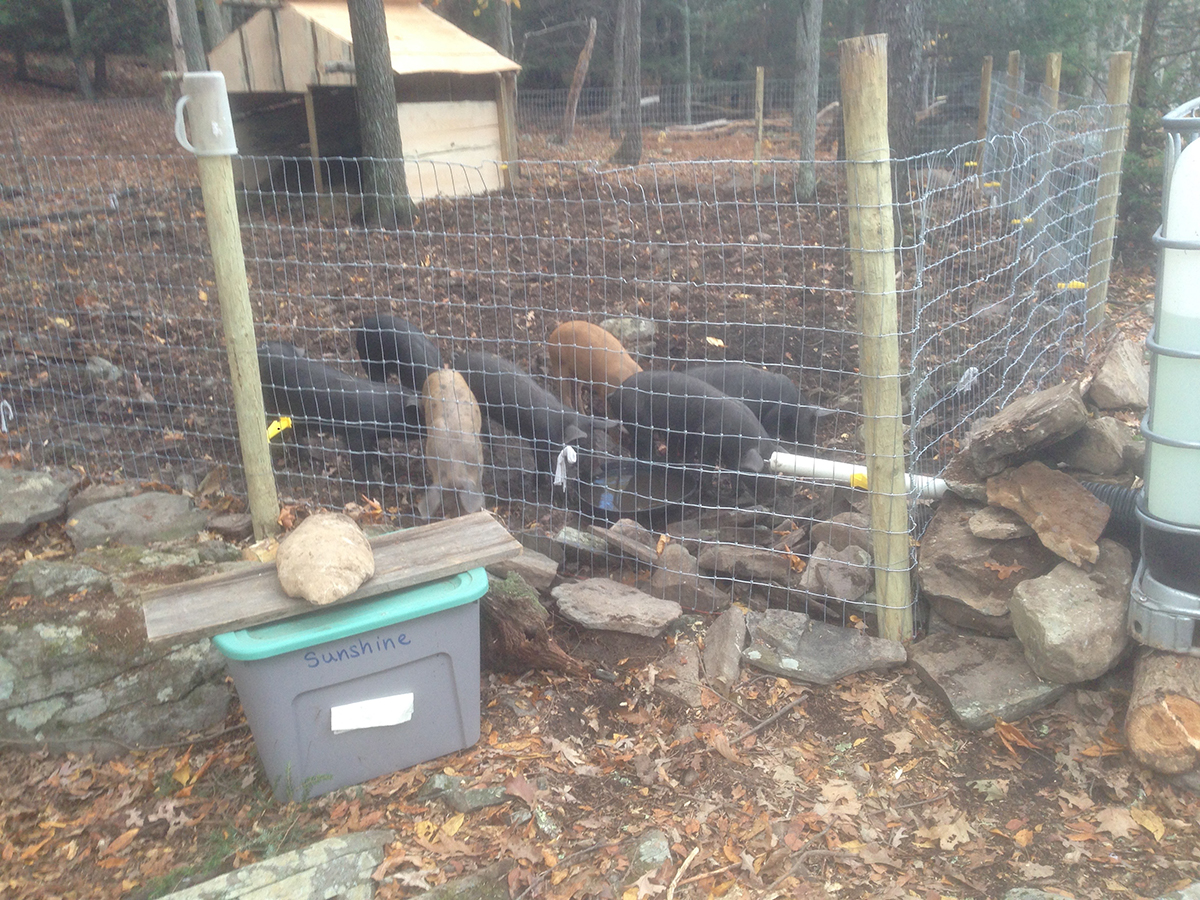
Above: Photo of pigs drinking from the water nipple. We put down a few logs for the tank to sit on, so that we don't need to pump the water "up" to the pigs.
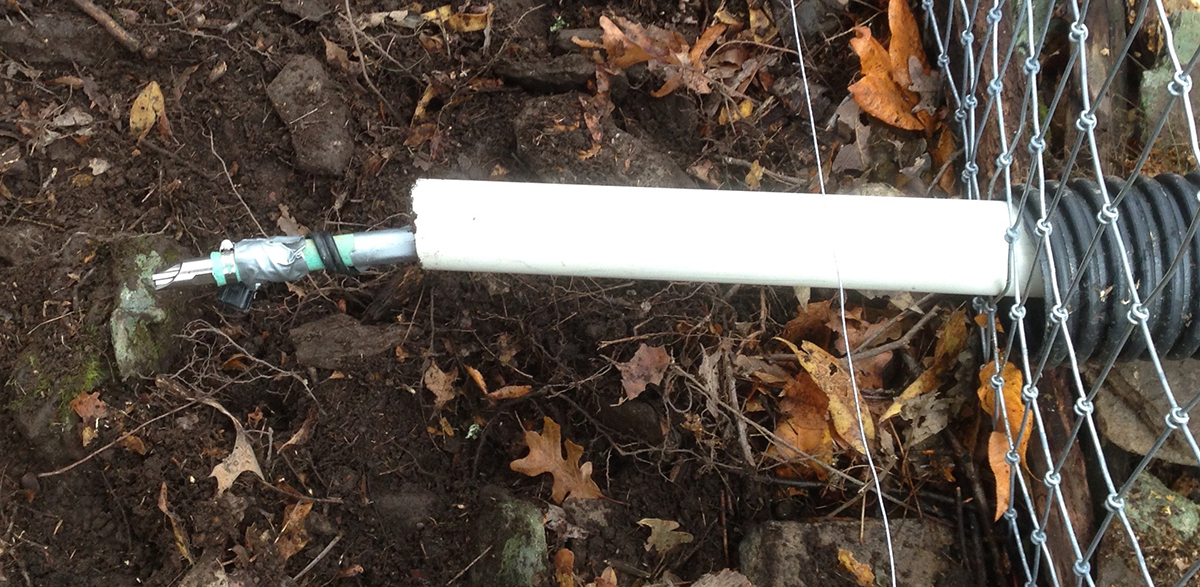
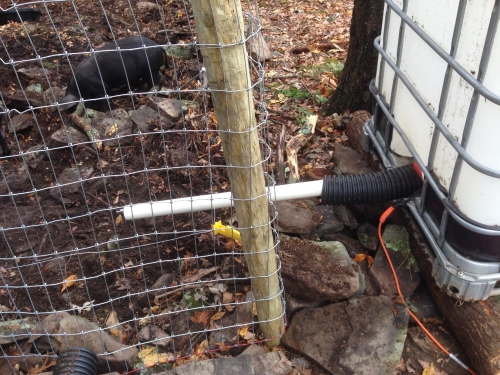
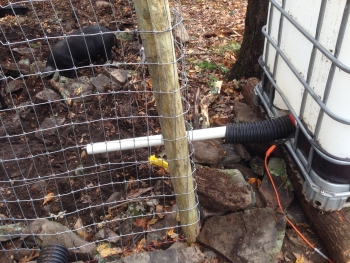
Above: The PVC pipe has been slid back (towards the tank) so that we can see the garden hose inside it. Notice the watering nipple clamped at the end, and the heating cable wrapped around it. The heating cable is wrapped around the garden hose several times inside the PVC pipe. It is important that you brace the PVC pipe so that this cannot happen when the pigs push into it; you don't want them to be able to chew on the garden hose or heating cable!
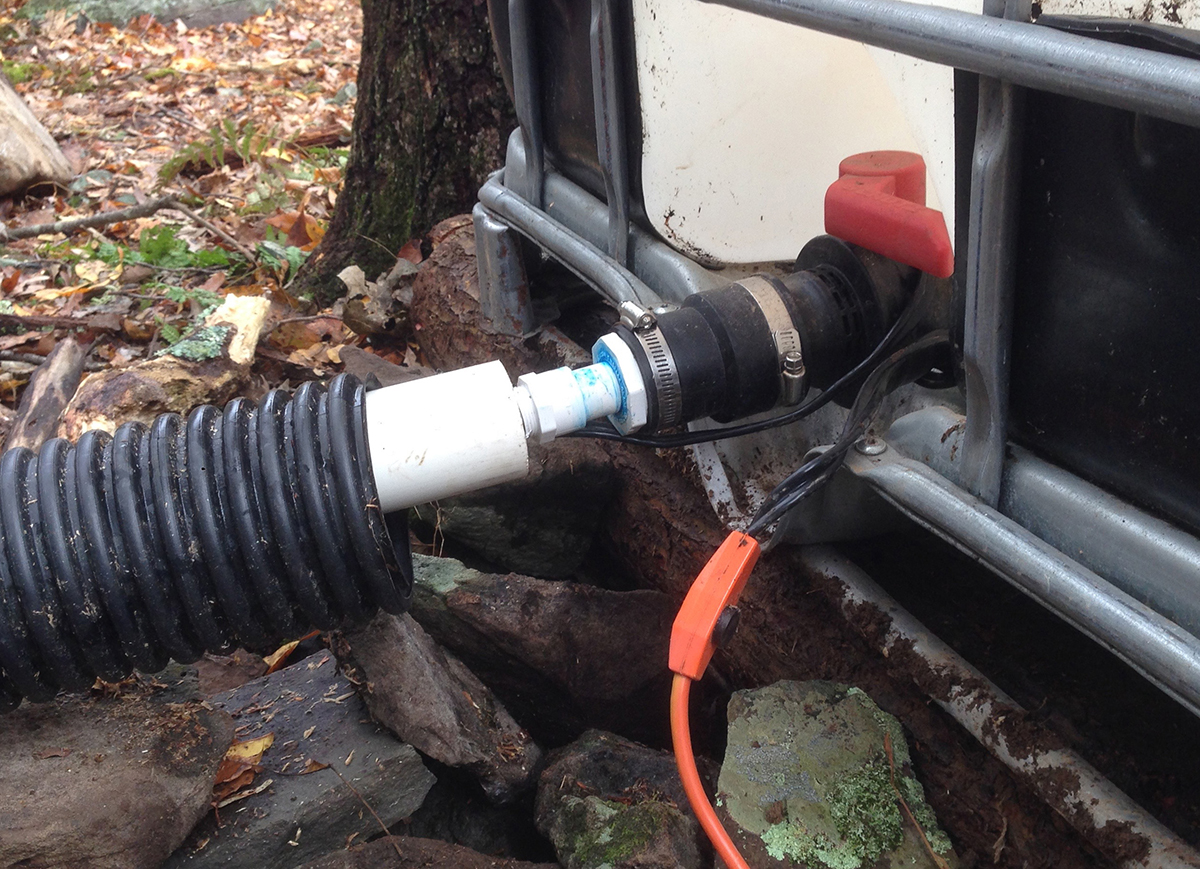
Above: The heating tape also wraps around the tank's spout and handle. Inside the tank itself is the drop-in tank de-icer. Note that the 2" PVC pipe does NOT attach to the tank itself. It is loose, so that the whole "arm" that sticks through the fence can wiggle freely, so that the pigs don't slam into the PVC and break a connection, causing it to leak.
Insulation
Not pictured, I stacked bales of hay all around the tank, and some loose hay on top. I plan on finding a better "blanket" to throw over the overall tank when the temperatures really drop. I'll post an update to this post once I figure out how much it's costing us in terms of electricity, hopefully by March 2016 after we get through the first winter.

